Pinterest is secretly a massive growth area for ecommerce store owners. Check out these facts:
• A whopping 93% of pinners use Pinterest to plan their purchases
• The average order value of a shopper from Pinterest is $50
• Two million people post product pins each day
• Pins are a true “set it and forget it” strategy
• You don’t need a single Pinterest follower to make this work
Find out some hot marketing strategies of how you can grow your sales on autopilot. The best part is that it only takes two hours of upfront work (and amazing content people love to pin). So how do you do it? Let’s dive in.
STEP #1: CREATE YOUR PINTEREST ACCOUNT
Alright, the first thing you need is a business Pinterest account. Simple enough, right? So go and do it! If you have a Pinterest Account, skip this step. But if you are planning to re-create your account, here are some psychology tricks to keep in mind for maximum success:
1. Use a high-quality photo of yourself as your profile picture.
Having a personal photo instead of a logo or grainy image will build trust and make it WAY easier for you to get into group boards.
2. If you’re a man, get your woman (or sister? mother? random friend who’s a woman?) in the picture with you.
The majority of Pinterest users are women. Of course, if it’s not an all-woman board, you’ll be fine. But the majority of Pinterest boards are run by smart women. So if you are a guy and have a picture with you and a woman, consider using it.
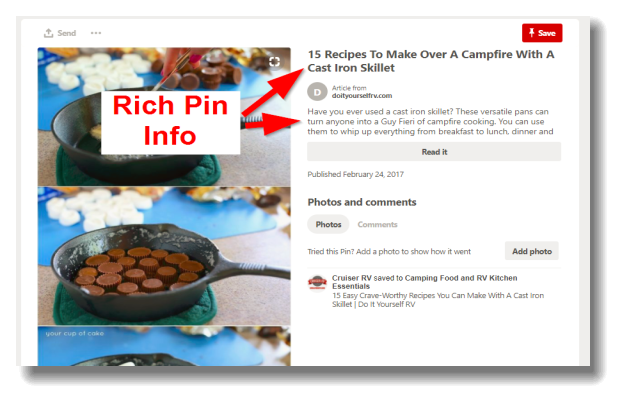
3. Don’t forget to activate Rich Pins.
Rich Pins add extra information to your pins. Article Rich Pins include a bold headline, in addition to the story description, in the stream.
There are also product rich pins, which show the price of your products. To set your account up for Rich Pins, use Pinterest’s validation tool to ensure your site has the proper meta tags.
STEP #2: ADD 10 BOARDS WITH 10 PINS EACH
Now your Pinterest is properly set up, but it’s looking a little bare. So fill it up!
(Note: If you already have a Pinterest account with lots of boards, skip this step.)
Create at least 10 boards around your niche. Look at the boards of similar sites for some ideas. For example, look at the boards of The Wandering RV with categories like RV Travel Destinations, RV Entrepreneurship, Cool RV Mods, etc.
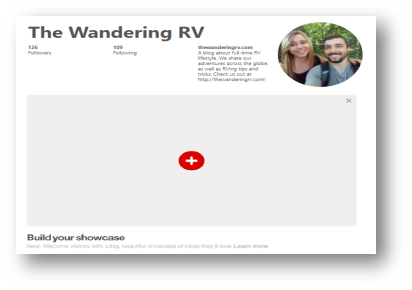
Note: These boards and pins should be of OTHER PEOPLE’S content, NOT yours. This is important! It has to look like you actually use Pinterest, not like you’re just spamming your own links. Of course, you should also add a “Best of” board to pin your own content. And, if you’re lucky, you can showcase that board at the top of your profile like this:
Pinterest doesn’t give it to every account immediately. But if you do have it, you’ll know it—just look at your profile. If you have a big grey box there, it’s enabled. It looks like this.
You can select up to five boards to showcase here, or you can just do one “Best of” board like done here. You can even showcase your products here. Speaking of which, create a Pinterest board of all your products. You can literally name this board something like “Our Products” or “[Brand Name] Products”.
STEP #3: USE PINGROUPIE TO FIND GROUP BOARDS
So how do you get tons of traffic without any followers? With group Boards. Group boards are Pinterest boards with multiple contributors. Many of them have thousands of followers and multiple pinners.
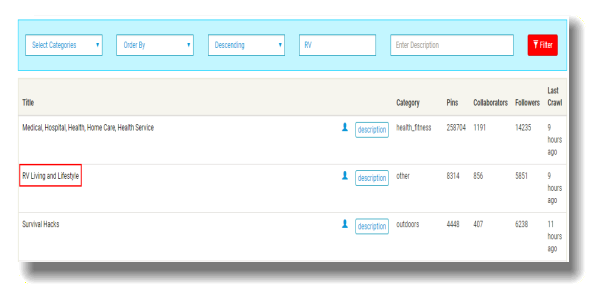
When you pin to one of these boards, your pin is seen by those thousands of people -even though you don’t have any followers! This is made possible by using a Free tool – PinGroupie. Search for something related to your content, then browse the results.
Pro Tip: Filter these massive lists by number of followers to show the best boards first. The number of pins and collaborators aren’t super important, but boards with only two or three collaborators might be hard to join. The other way to find group boards is by going to the accounts of your competitors or other people in your niche and looking to see if they’re in any group boards. Once you’ve made a list of Pinterest Group boards, you need to reach out to these people to join the board.
Step #4: Reach Out To The Board Owners
Before you start spamming people with messages to join their group boards, take a chill pill. We don’t want to do that. These people get a ton of messages through Pinterest. Plus, if you send too many Pinterest messages, Pinterest could ban your account.
Side note: When joining a Pinterest board, there is no formal way to submit an application through Pinterest. They literally have to send you an invitation. So reaching out to them directly is the only way to join their board. Instead, send them an email.
Further, you should always follow a board’s rules. You can and will get kicked off and develop a bad rep quickly if you don’t. The rules for every board are different.
They’re sort of “unwritten rules” set by the board owner. Some boards don’t even have rules.
Pro Tip: Don’t forget to follow up with them once or twice if they don’t answer you within a few days! The magic is in the follow up. Something like 50% of all closes come after a follow up, not on a first email. Get on it!
Step #5: Create Pinnable Images For Your Best Articles
Trying to pin your articles to Pinterest with the featured image from your blog post is, in a word… dumb. The aspect ratio of a featured image is typically wider than it is tall. So they look really stupid on Pinterest. The best Pinterest ratio is 2:3, with a minimum width of 600 pixels.
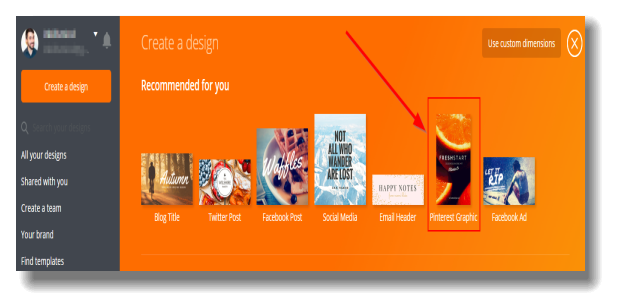
Pinterest is a hugely visual platform. People click based on whether the IMAGE captures their attention, not the text in the pin description. So if you want a wildly successful Pinterest campaign, you need to get good at creating decent images. Luckily, tools like Canva exist.
Just click the template that says “Pinterest Graphic”, then start designing your image.
Canva has premade designs and layouts to make things even easier for people who know nothing about design. Try to keep your imagery, colors, and branding consistent. Once you’ve created the image, I like to add it in twice. Once in the introduction and once at the end with a “pin it” link.
This increases your chances of getting Pinterest traffic. To create a good link on the “Pin it!” text, first publish your post, then try to pin it. Copy the link from the URL and hyperlink that to your “Pin it!” text.
So now you’ve got some awesome content with great Pinterest images. Or at least passable images. Time for the part where you get traffic.
Step #6: Use Tailwind To Automate Your Pinning
When you’re in a Pinterest group with a lot of pinners, your image can get drowned out pretty quickly. To beat this, repin your content multiple times. However, repinning things multiple times to half a dozen different boards is a pain. That’s where Tailwind comes in.
Automatically Pin at the best times for more engagement, reach, and website traffic with one tool.
Disclaimer: Not all boards allow you to repin the same post multiple times. Make sure you follow your group board’s rules!
Note: If your board has a rule that you can only pin once per day, be sure to follow that. Again, follow your boards rules! Now, anything you pin to these secret boards will be automatically pinned (and repinned) to the group board of the corresponding name.
Step #7: Monitor The Results (And Add More Content To Your “Secret Boards”)
Once you’ve set everything up and let it run for 3-4 weeks, you should have a good idea of which boards are performing best. Tailwind will show you stats for all of your pins on that board.
Beyond that, keep creating great content and adding it to your secret boards to keep things fresh and running like a well-oiled machine!
